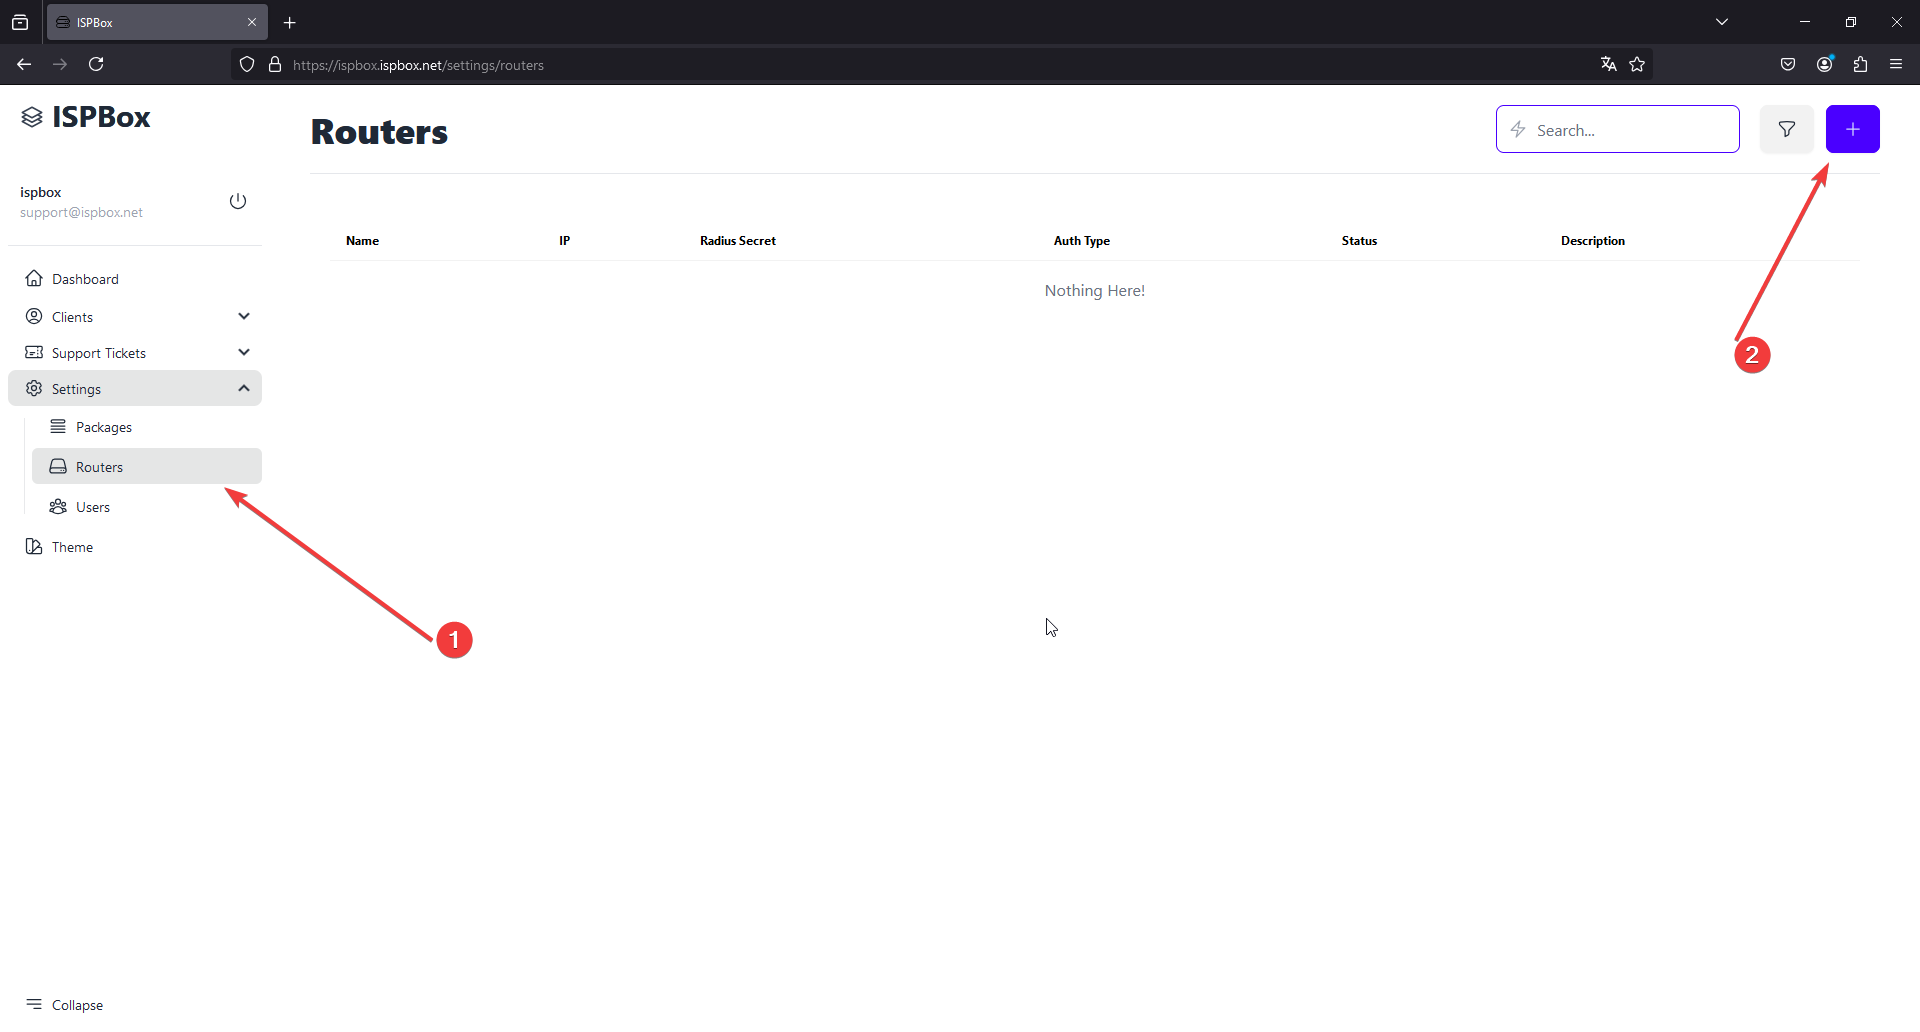
Step 1: Access the Router Settings
- Navigate to the ISPBox sidebar menu on the left side of your screen.
- Click on "Settings" to expand the settings menu options.
- Select "Routers" from the dropdown menu. This will take you to the Routers settings page where you can view existing routers or add new ones.
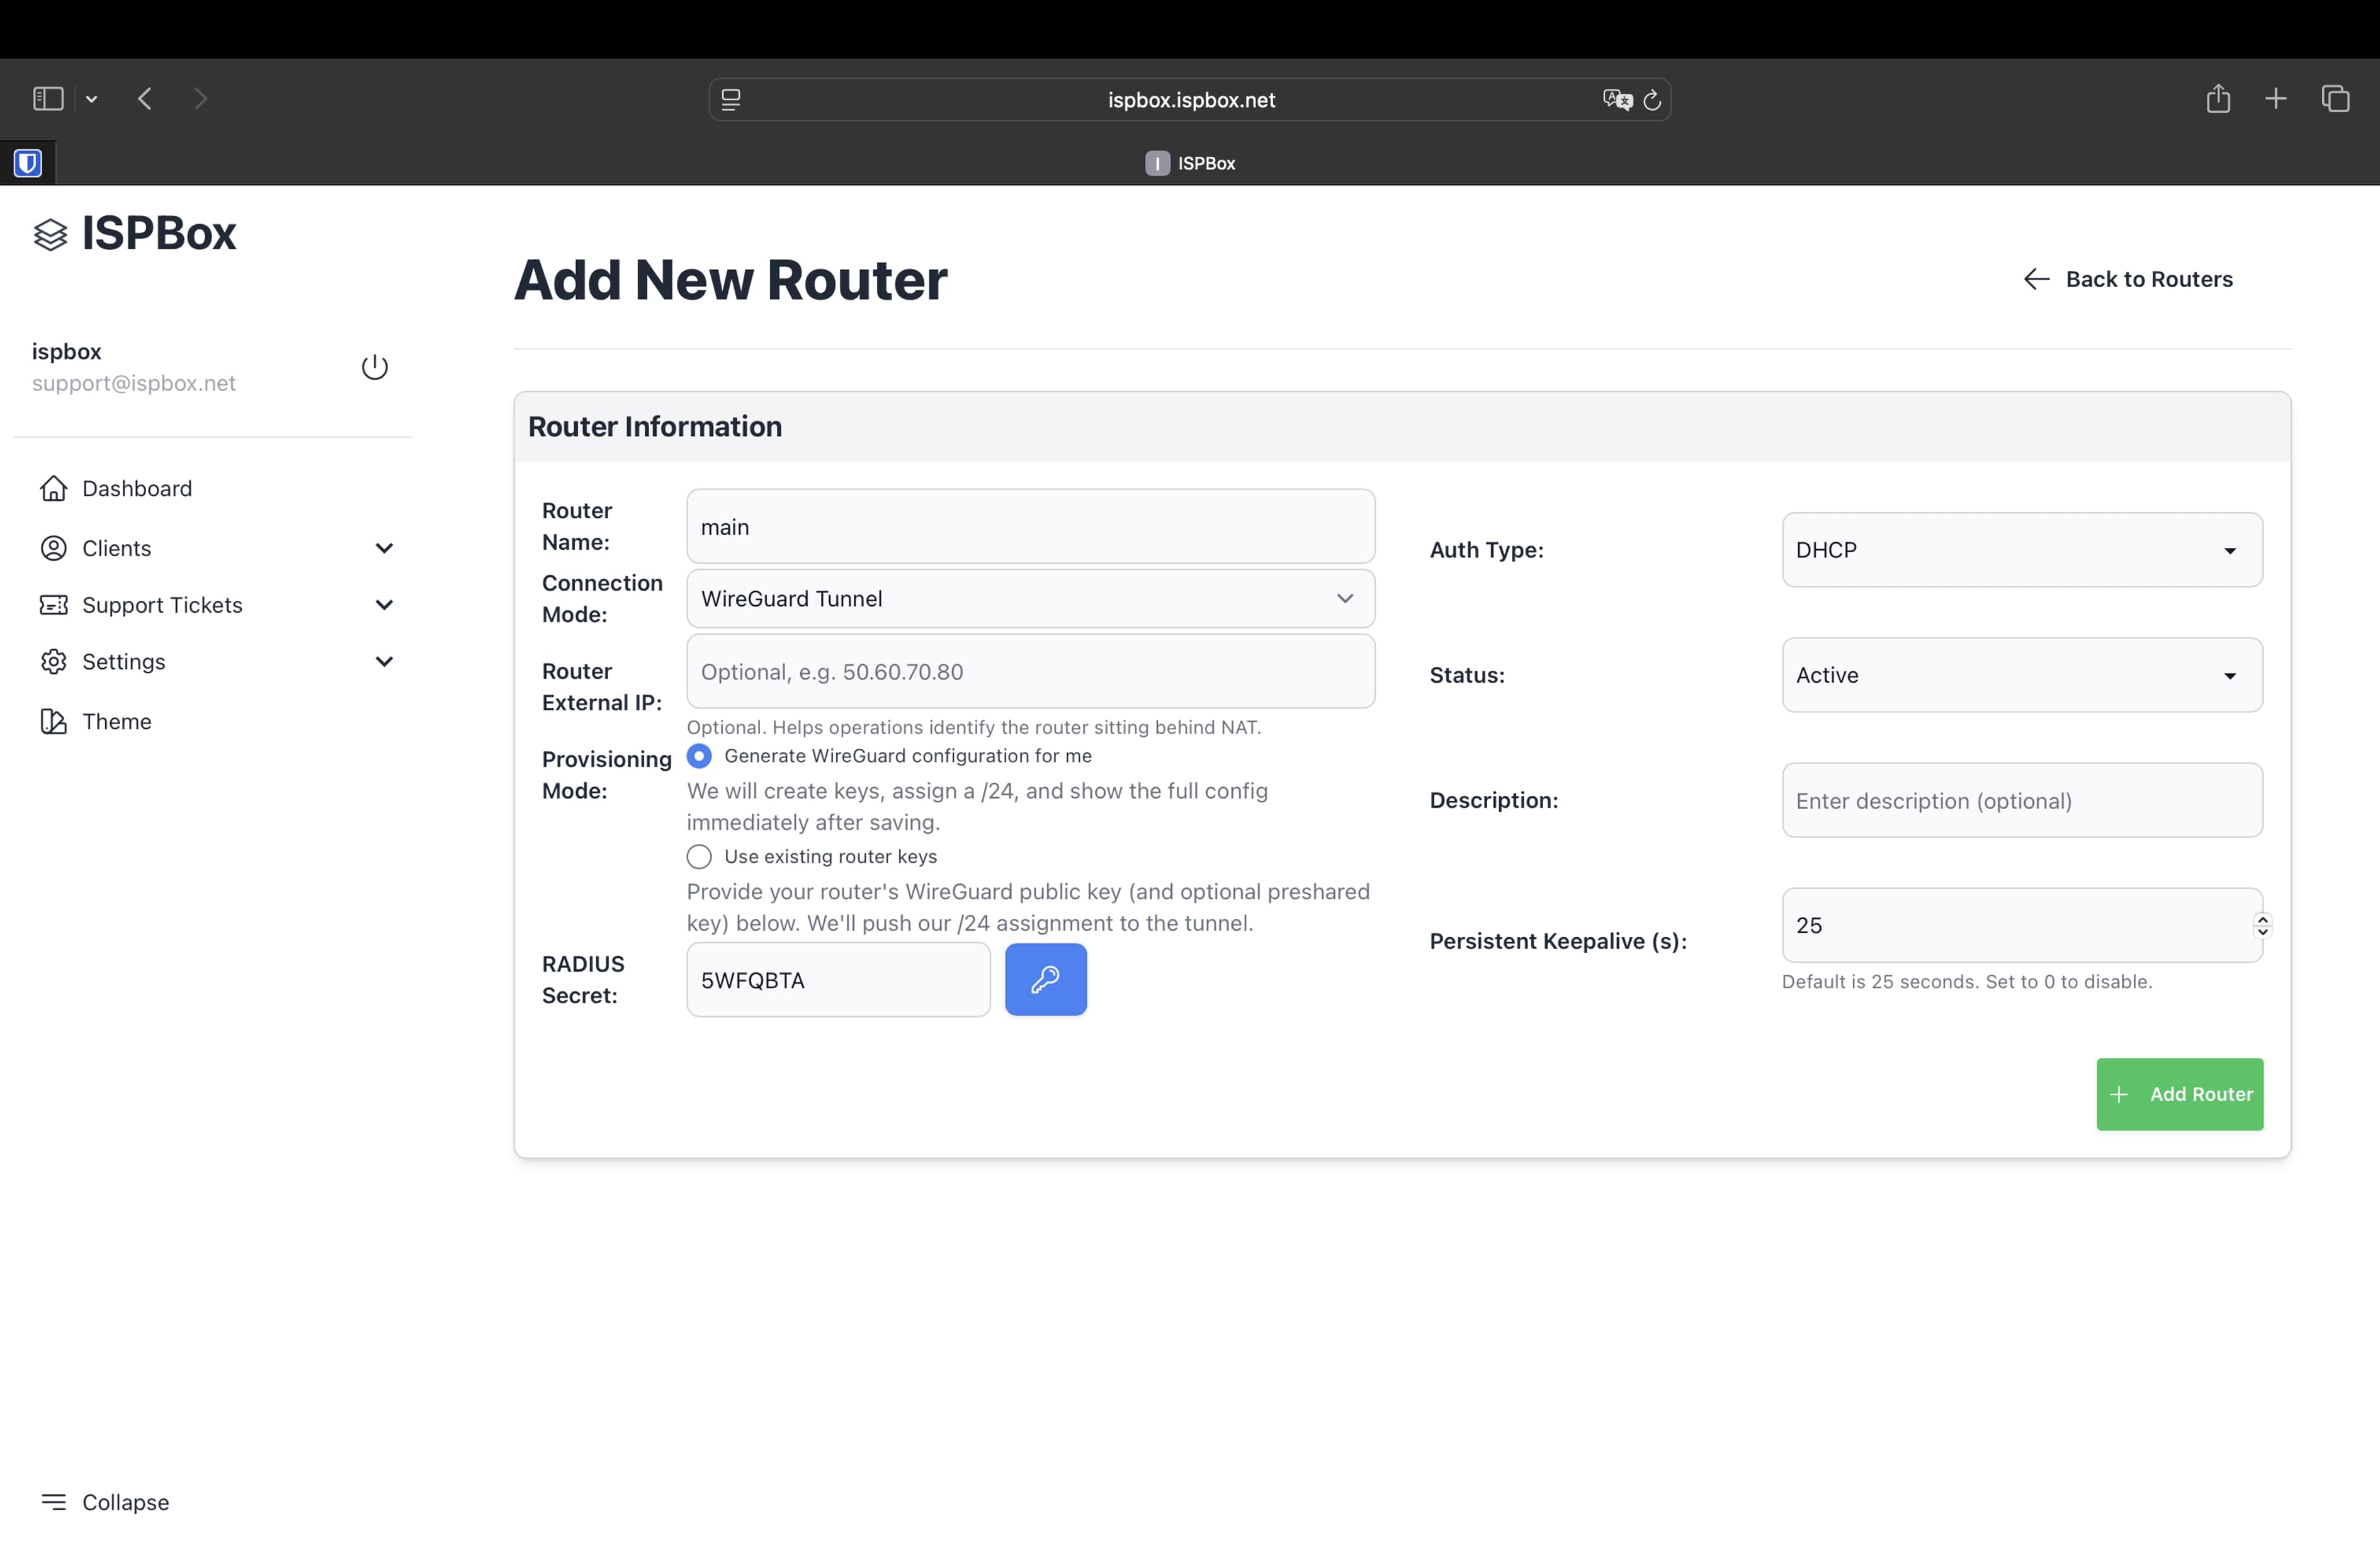
Step 2: Enter Router Details
On the Routers settings page, click on the "+" button located at the top right corner of the screen to add a new router.
Fill in the required fields for your router:
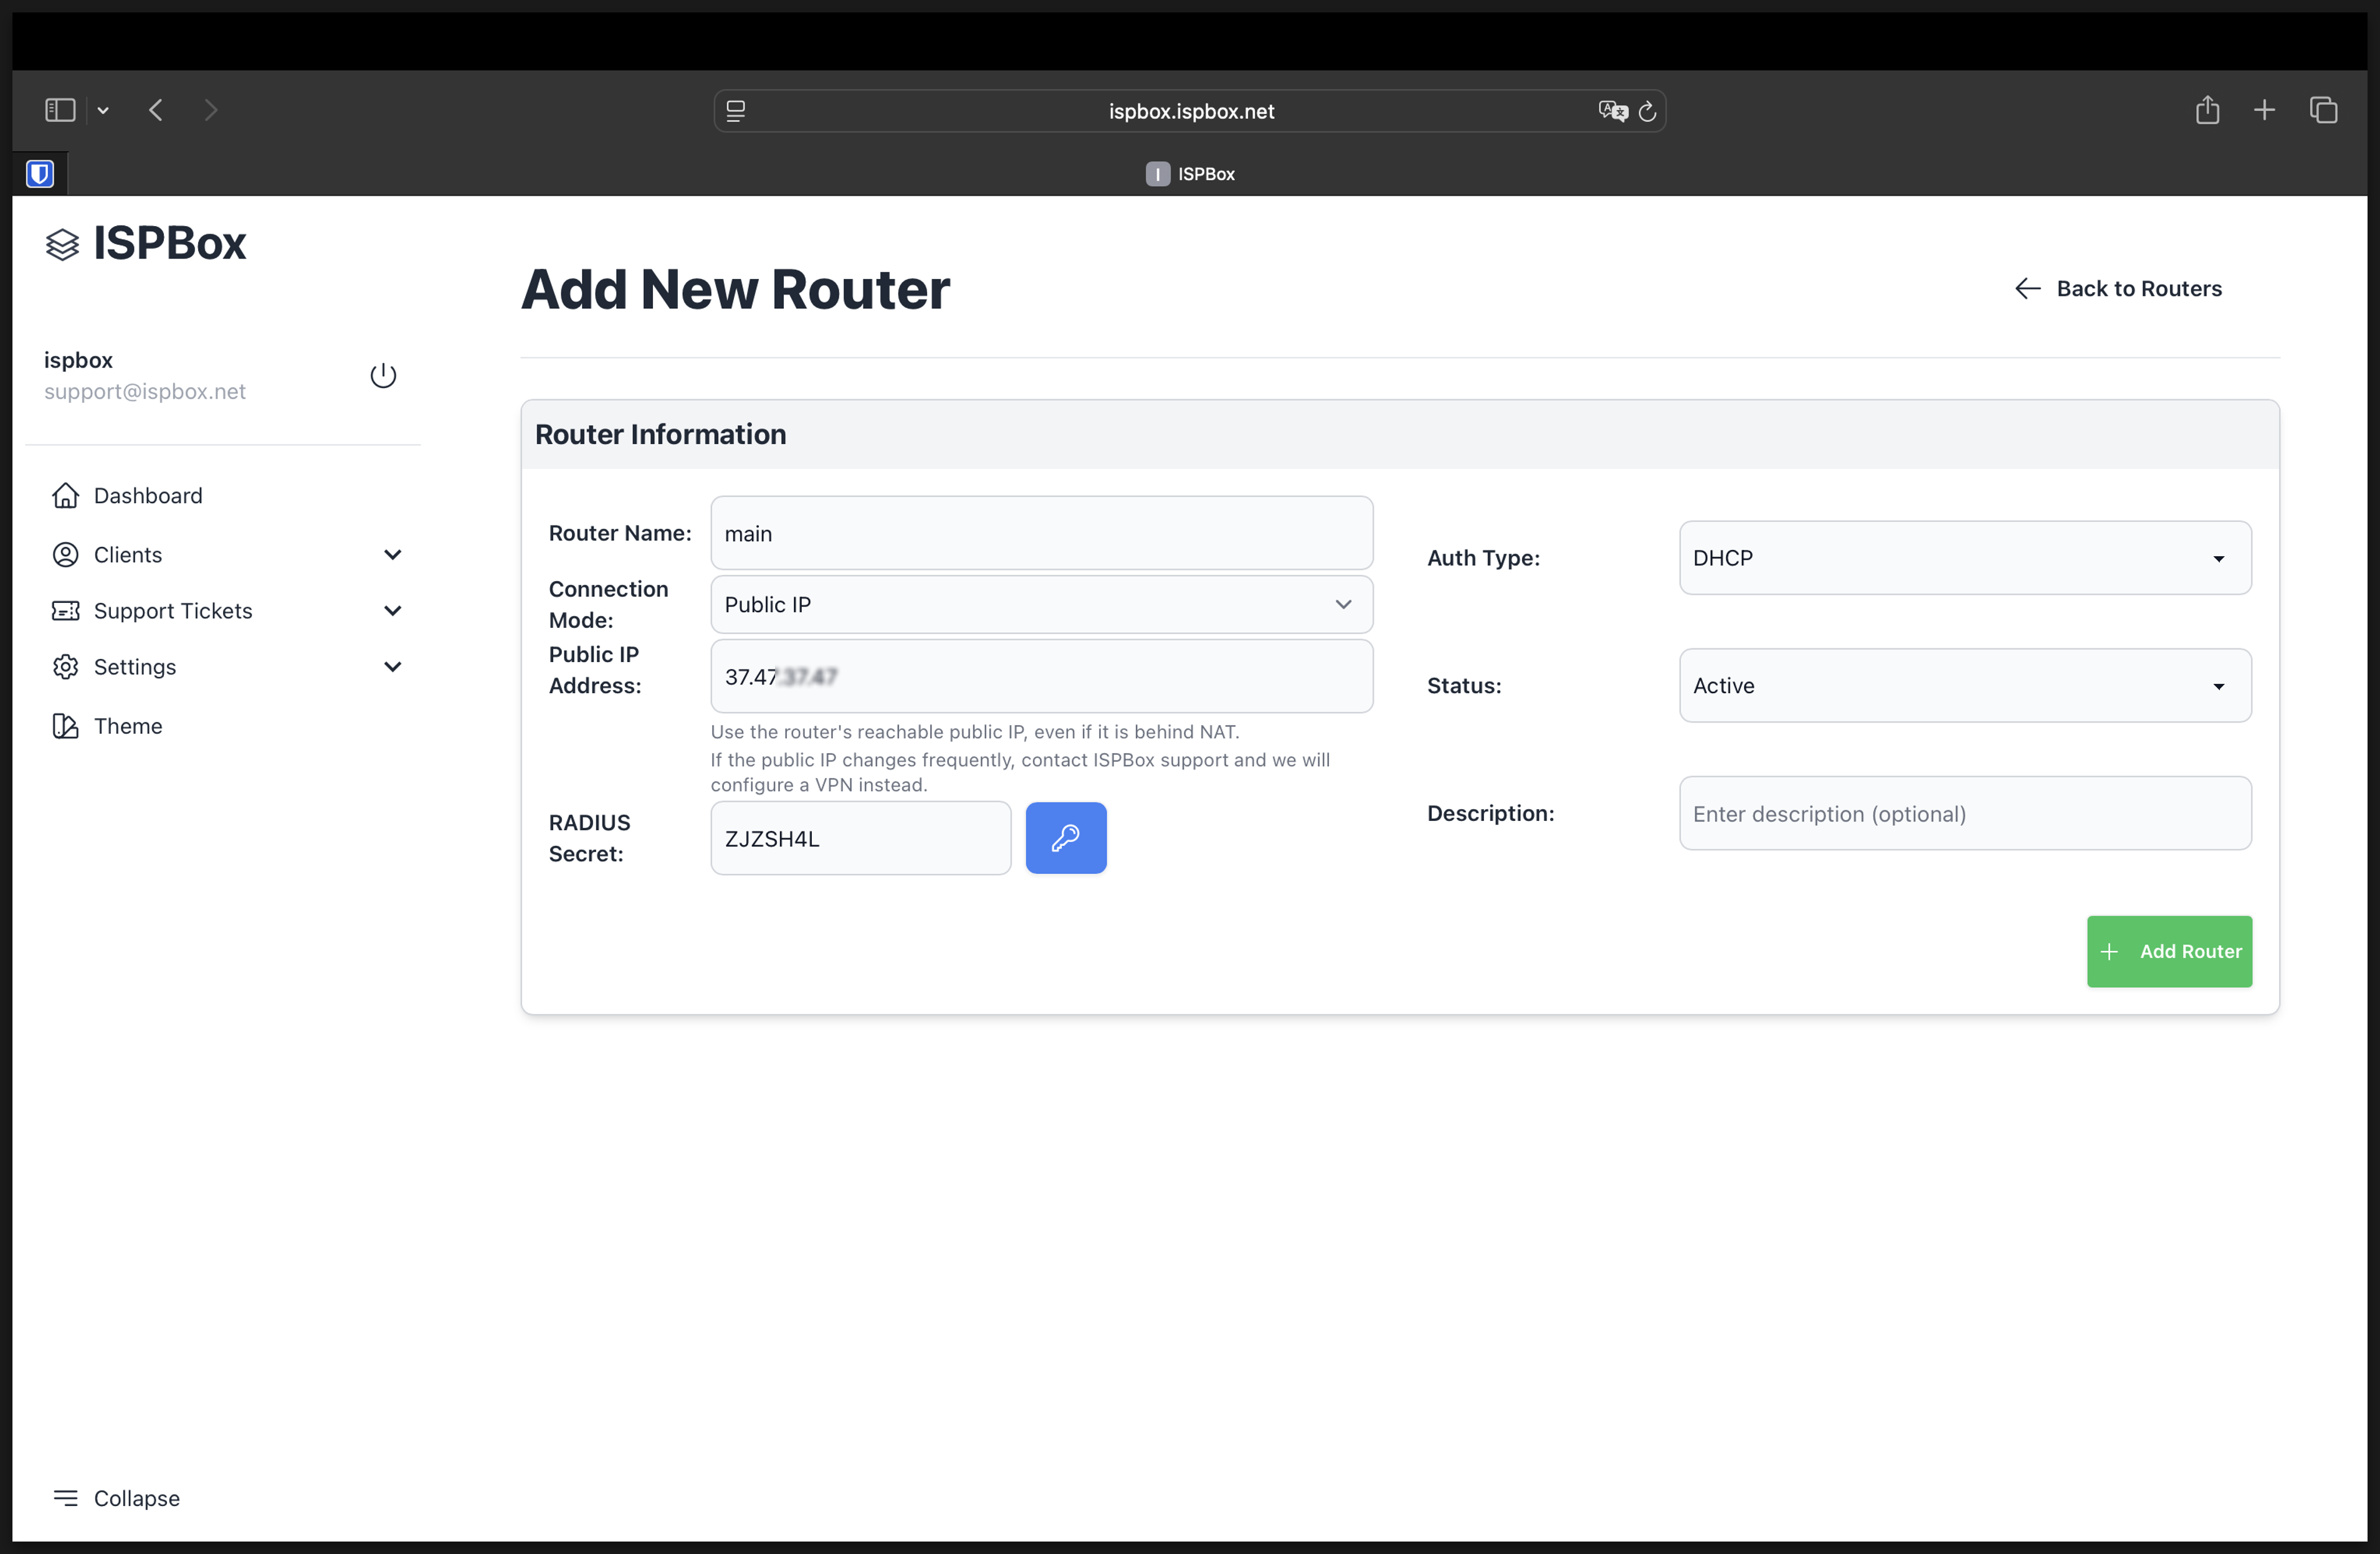
- Router Name: Enter a unique name for the router.
- Connection Mode: Public IP or Wireguard (We highly recommend using wireguard, use public IP ONLY if you have static public IP)
- IP Address: Provide the public IP address of the router. This must be a public IP, even if you are behind NAT. If your IP changes due to NAT, please use Wireguard.
- RADIUS Secret: Enter the RADIUS secret key that will be used for authentication.
- Auth Type: Select the type of authentication the router will use.
- Status: Set the router's status.
- Description (Optional): Enter a description for the router for easier identification or noting special configurations.
After entering all the details, click the "Add Router" button.
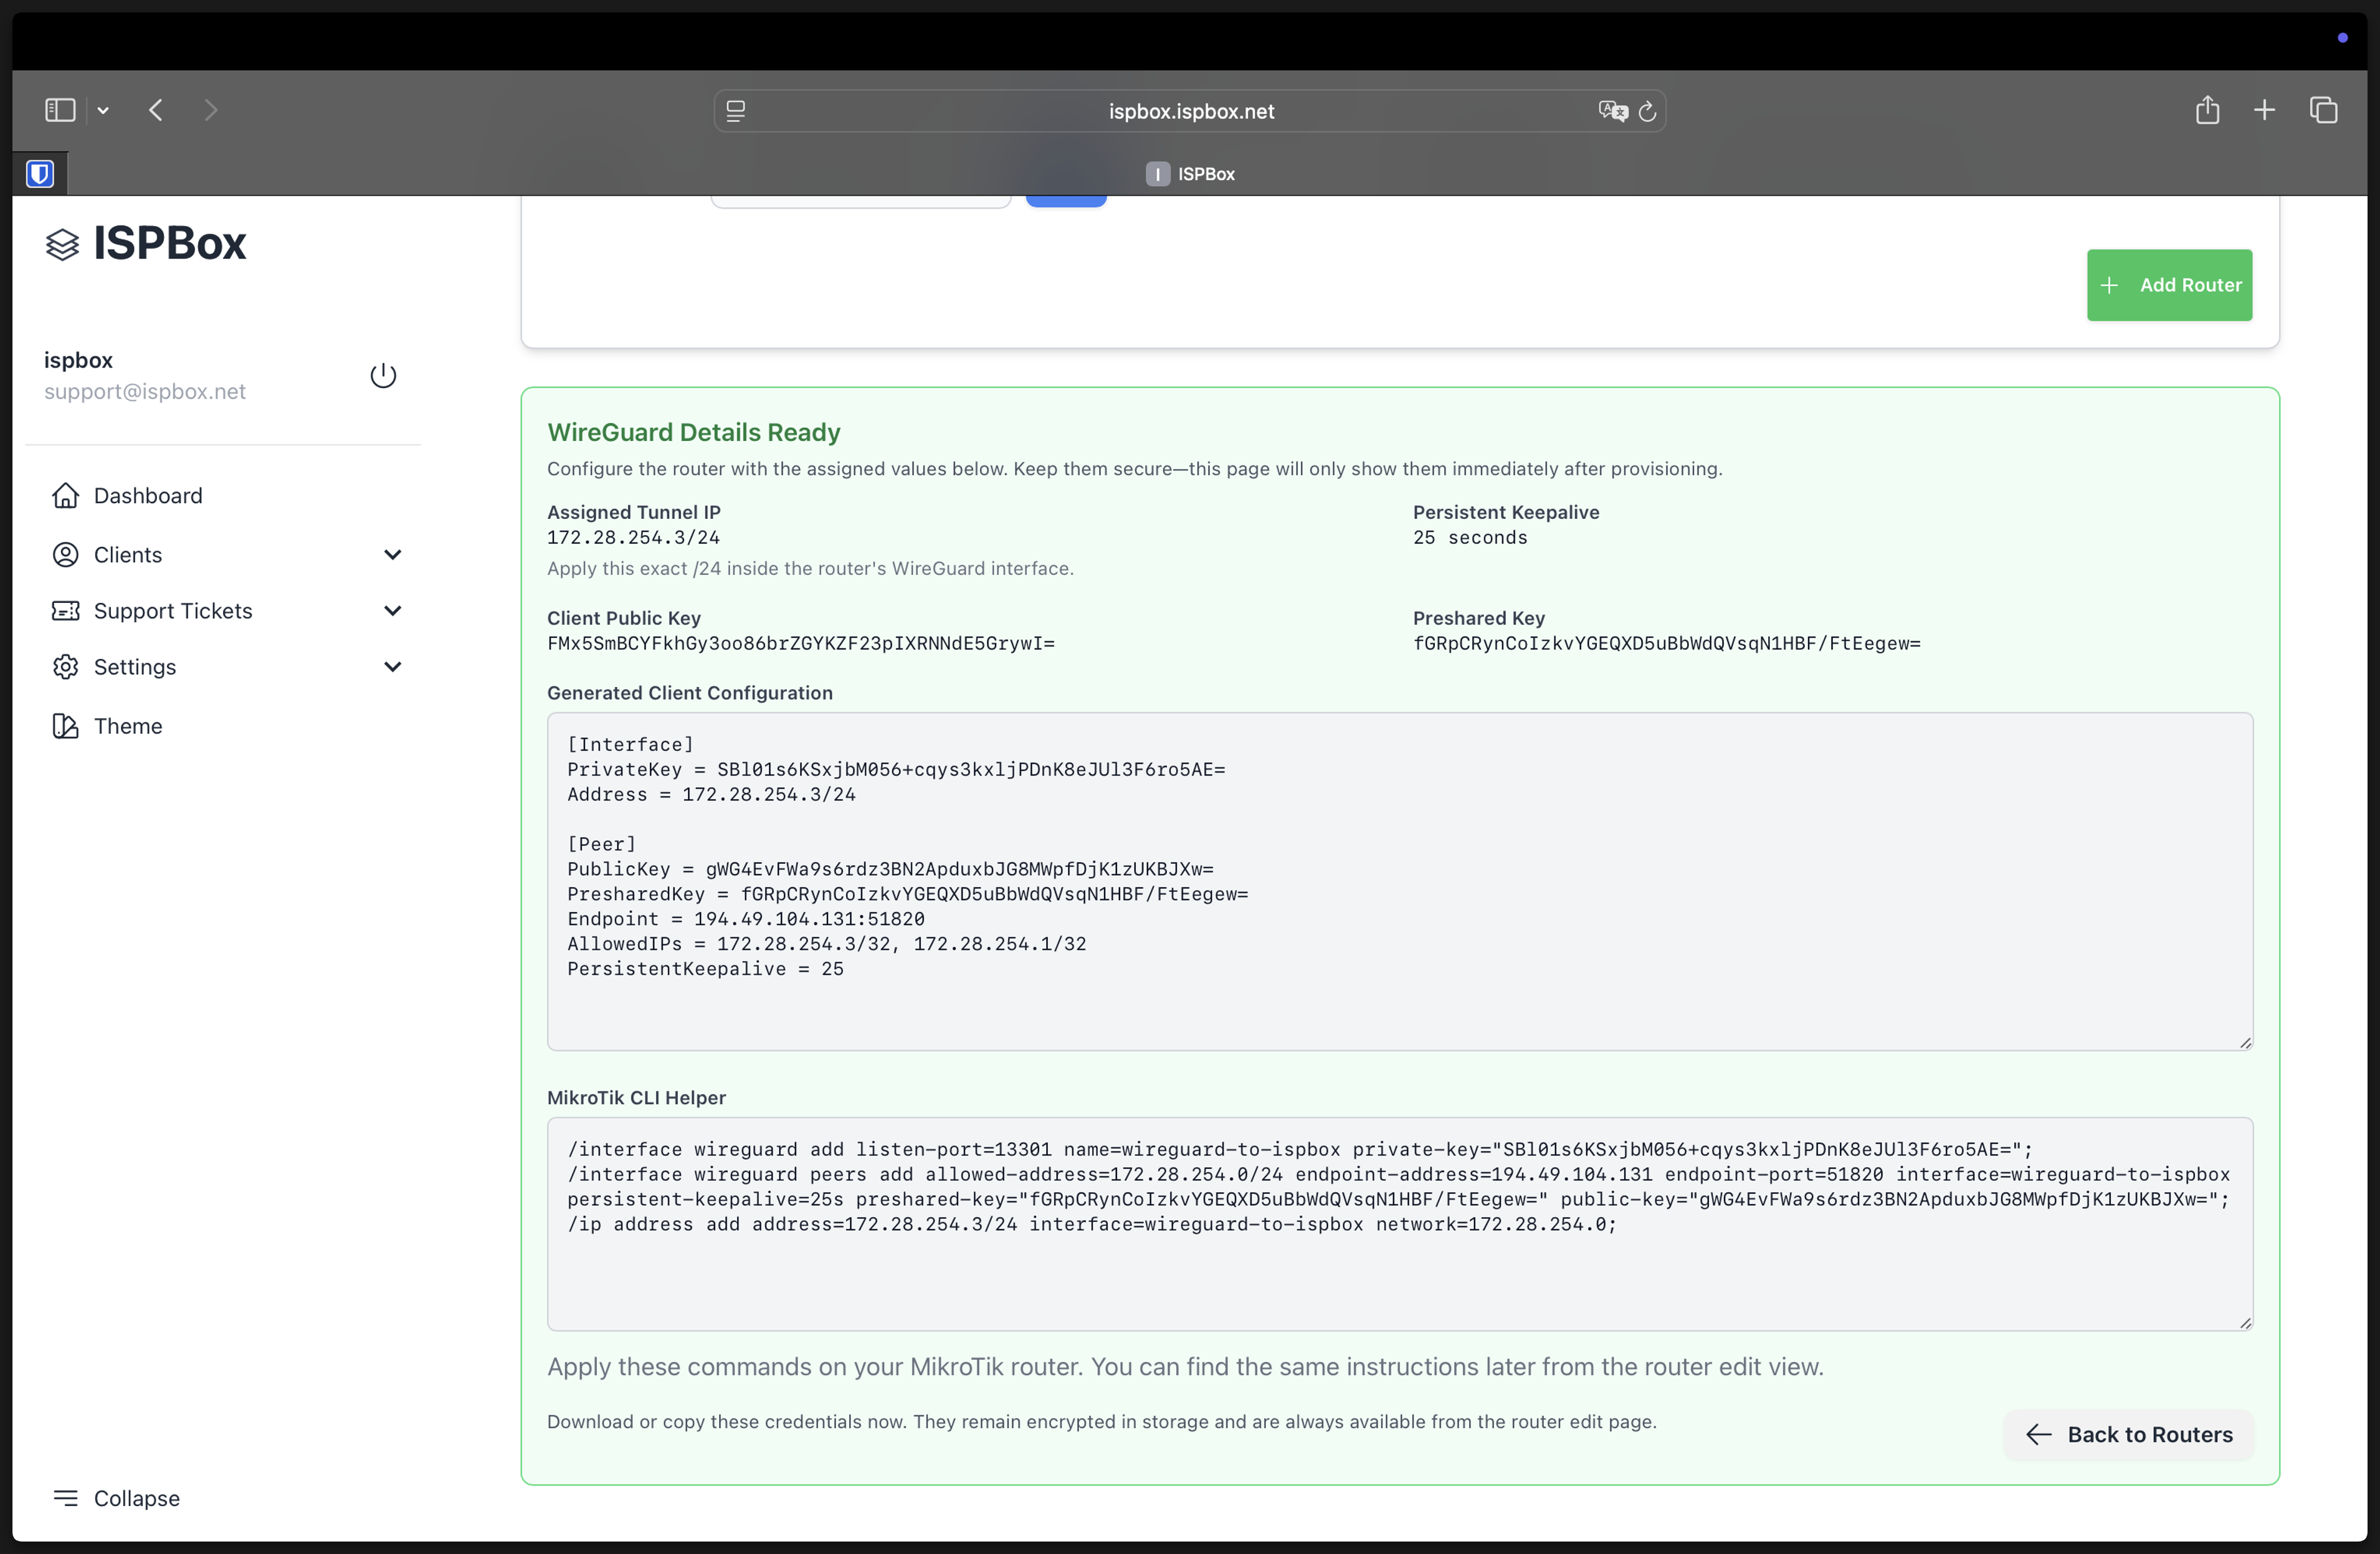
After you click “Add Router” you will see your config for for WireGuard. You can just copy commands from “Mikrotik CLI Helper” and past it to terminal in Mikrotik
Step 4: Confirm the Addition
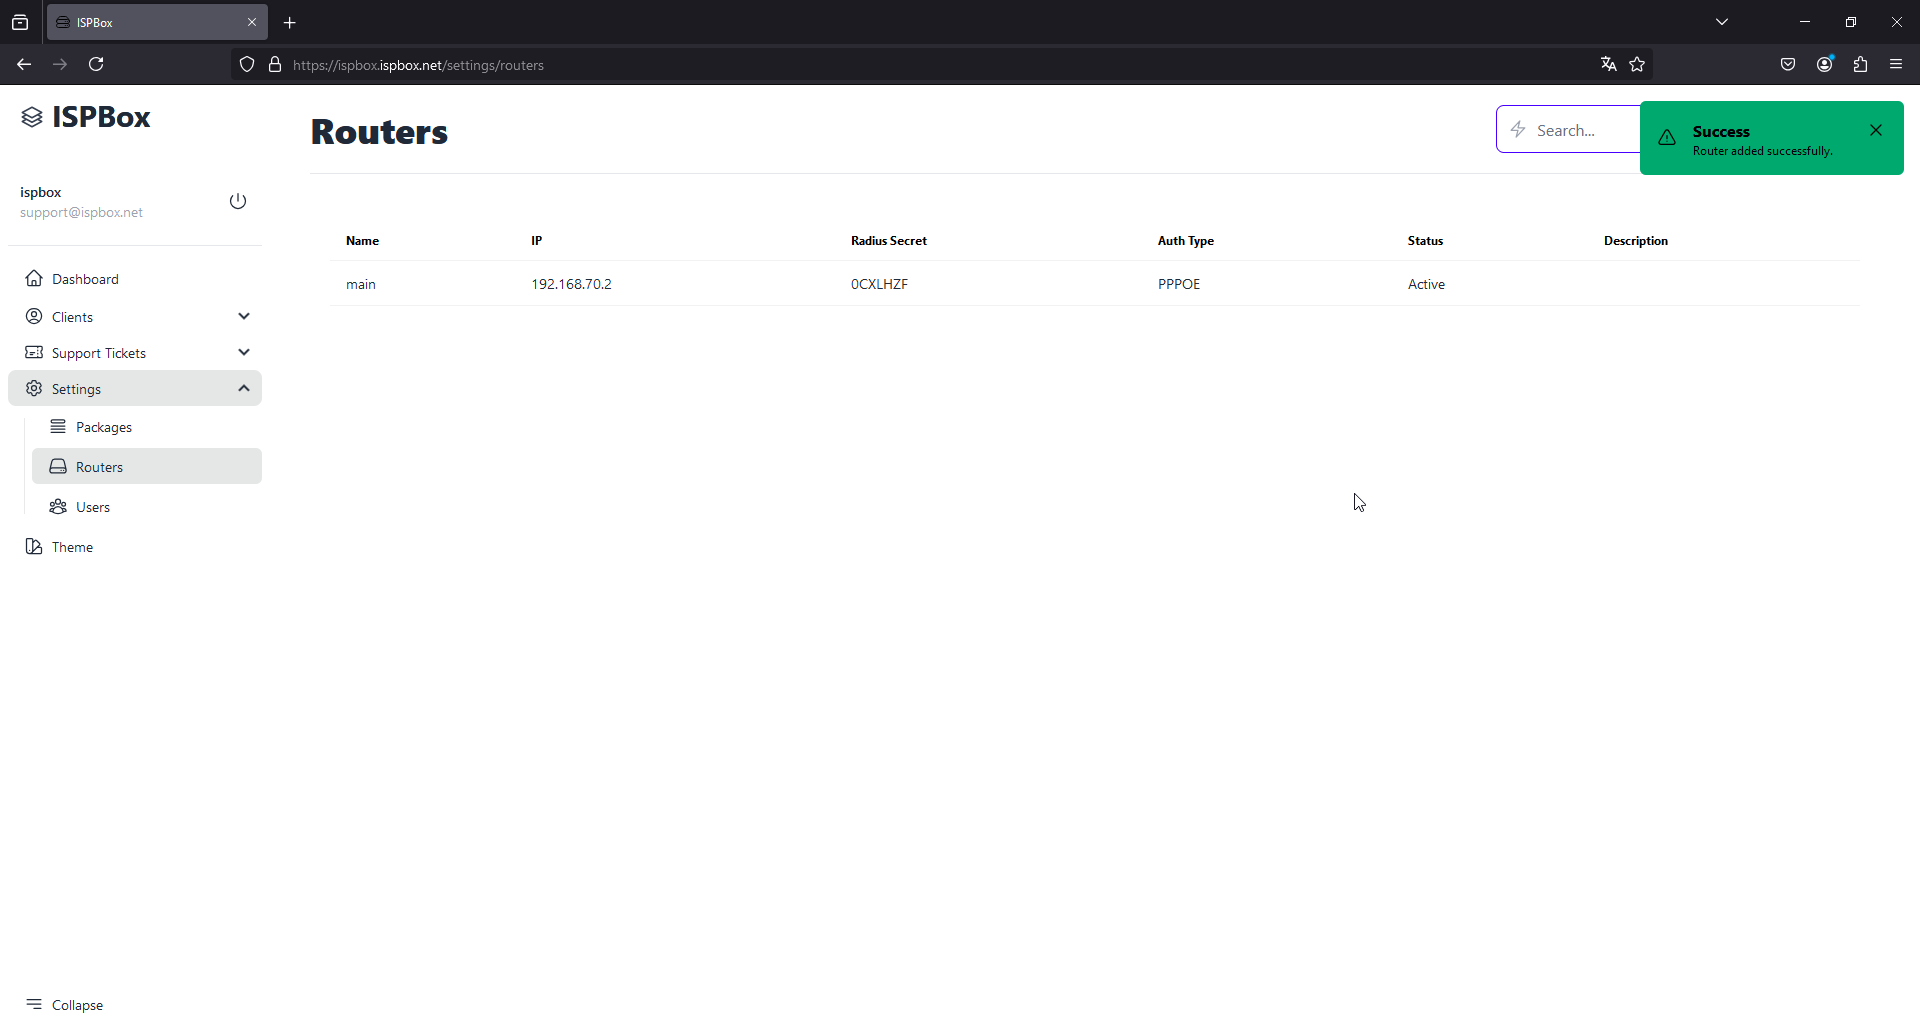
Once the router is added successfully, you will be redirected back to the router list page.
A confirmation message "Success: Router added successfully." will appear at the top of the list, and you should see your new router listed with the details you provided.
By following these steps, you can easily add and configure routers within the ISPBox system to manage your network effectively. If you encounter any issues regarding IP address changes or need further assistance with setting up a VPN, please contact our support team for personalized help.