1. Adding a Ticket
You can add a ticket in two ways:
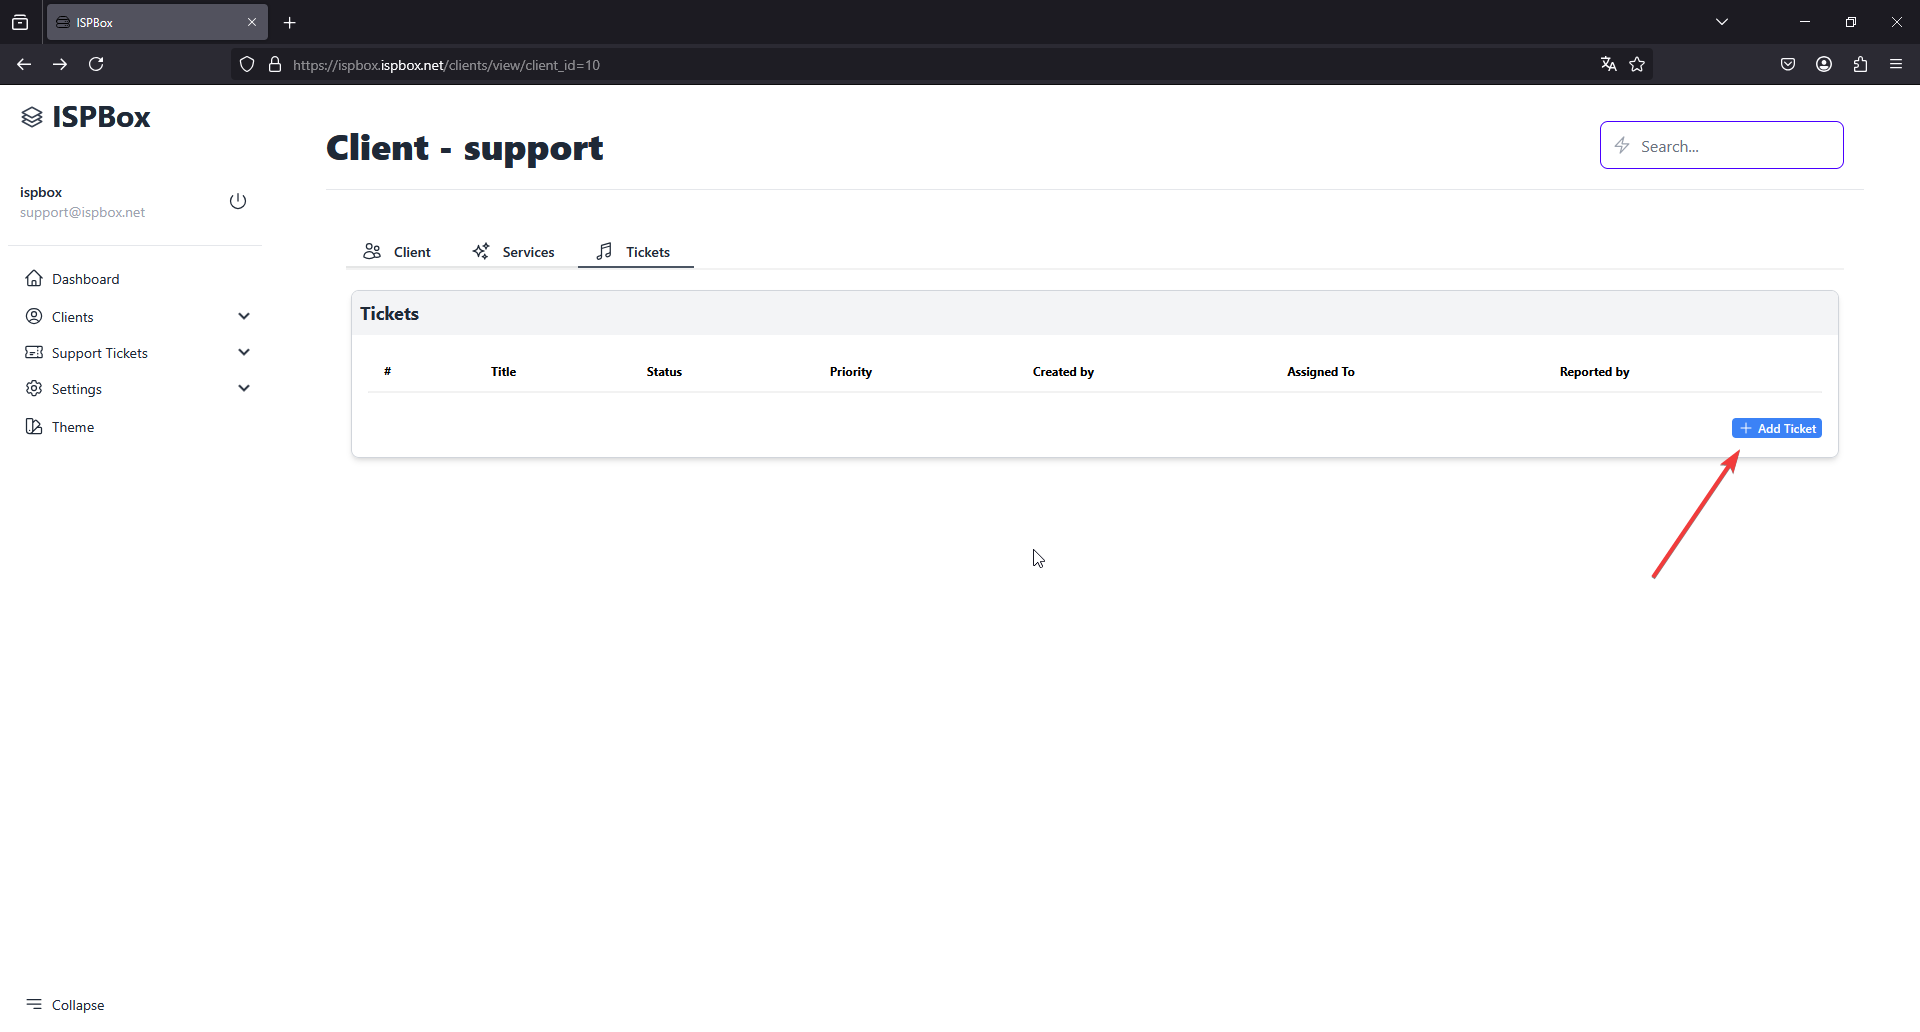
a) Adding from the Client's Profile:
- Navigate to "Clients" from the sidebar menu.
- Select the desired client and go to the "Tickets" tab.
- Click on the "+ Add Ticket" button. The form will automatically include the client’s information, though you can modify any details necessary.
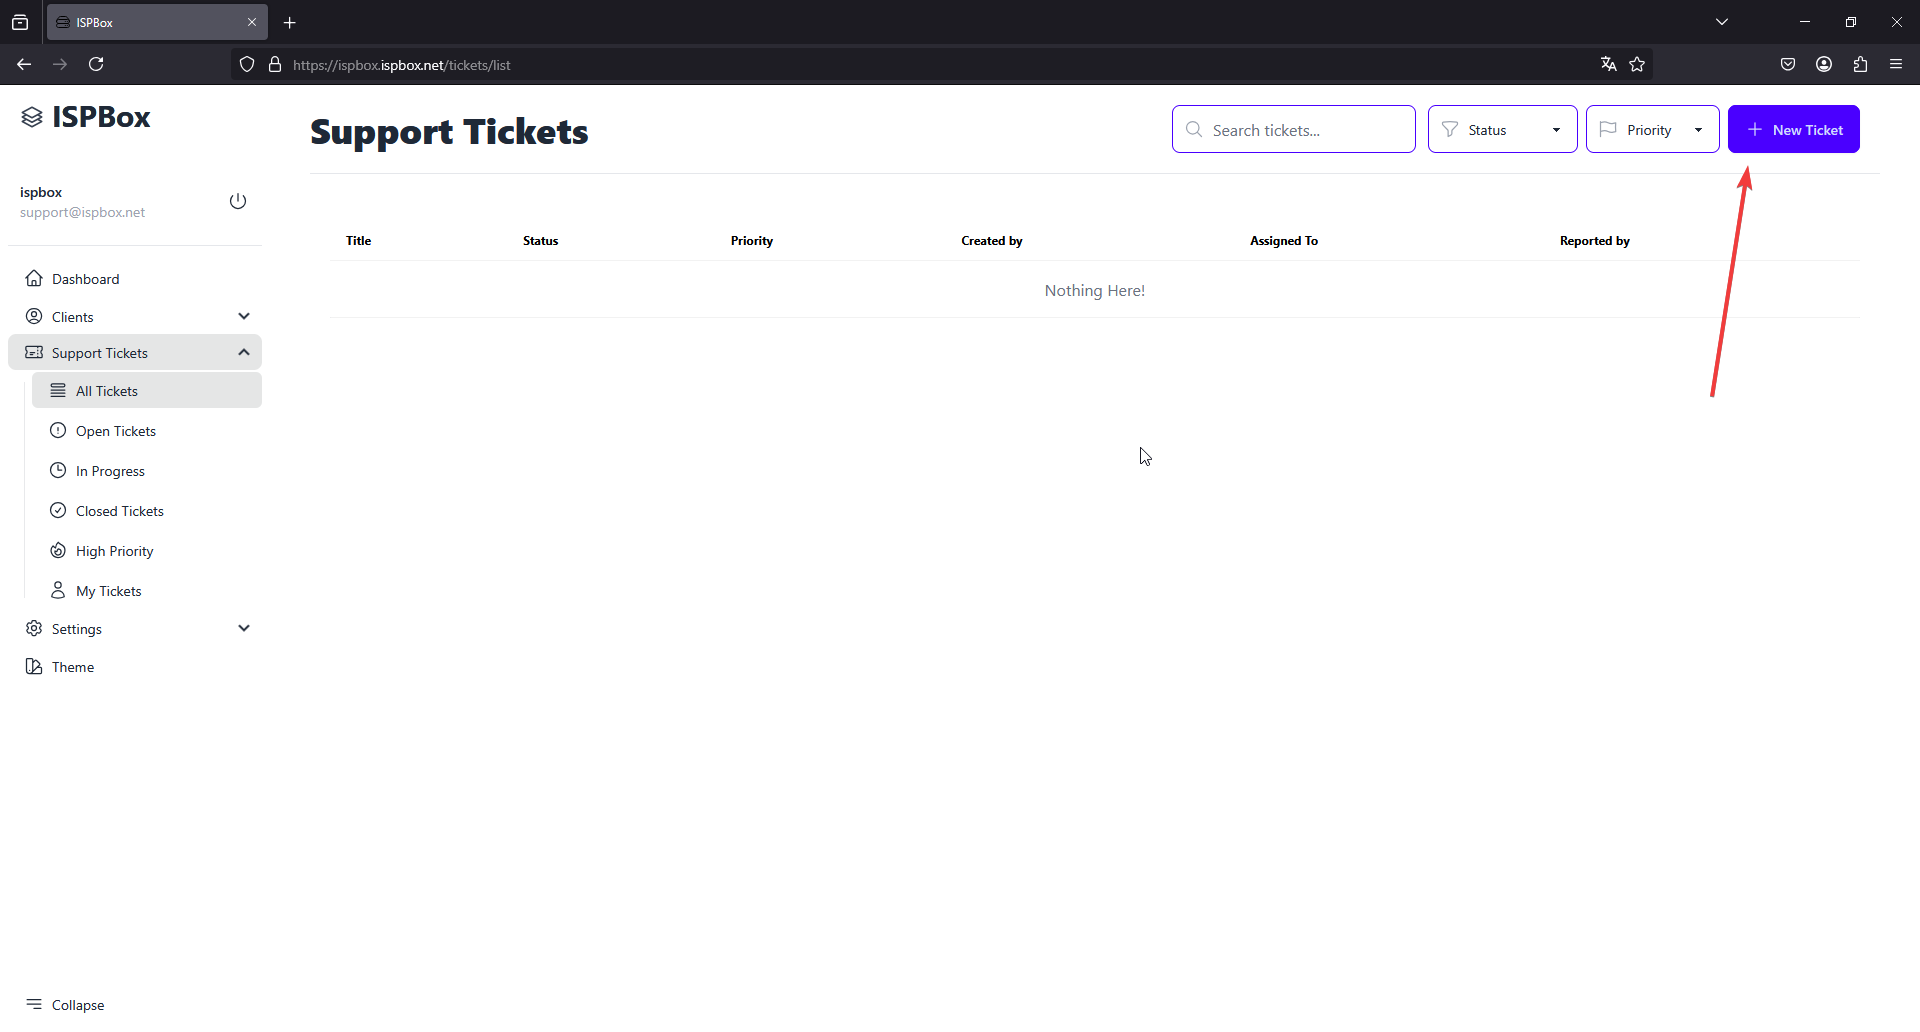
b) Adding through 'Support Tickets':
- Click "Support Tickets" in the sidebar menu and select "All Tickets."
- Press the "+ New Ticket" button at the top right of the screen.
- Manually enter or select the client's name in the 'Search Client' field if you want to link the ticket to a specific client.
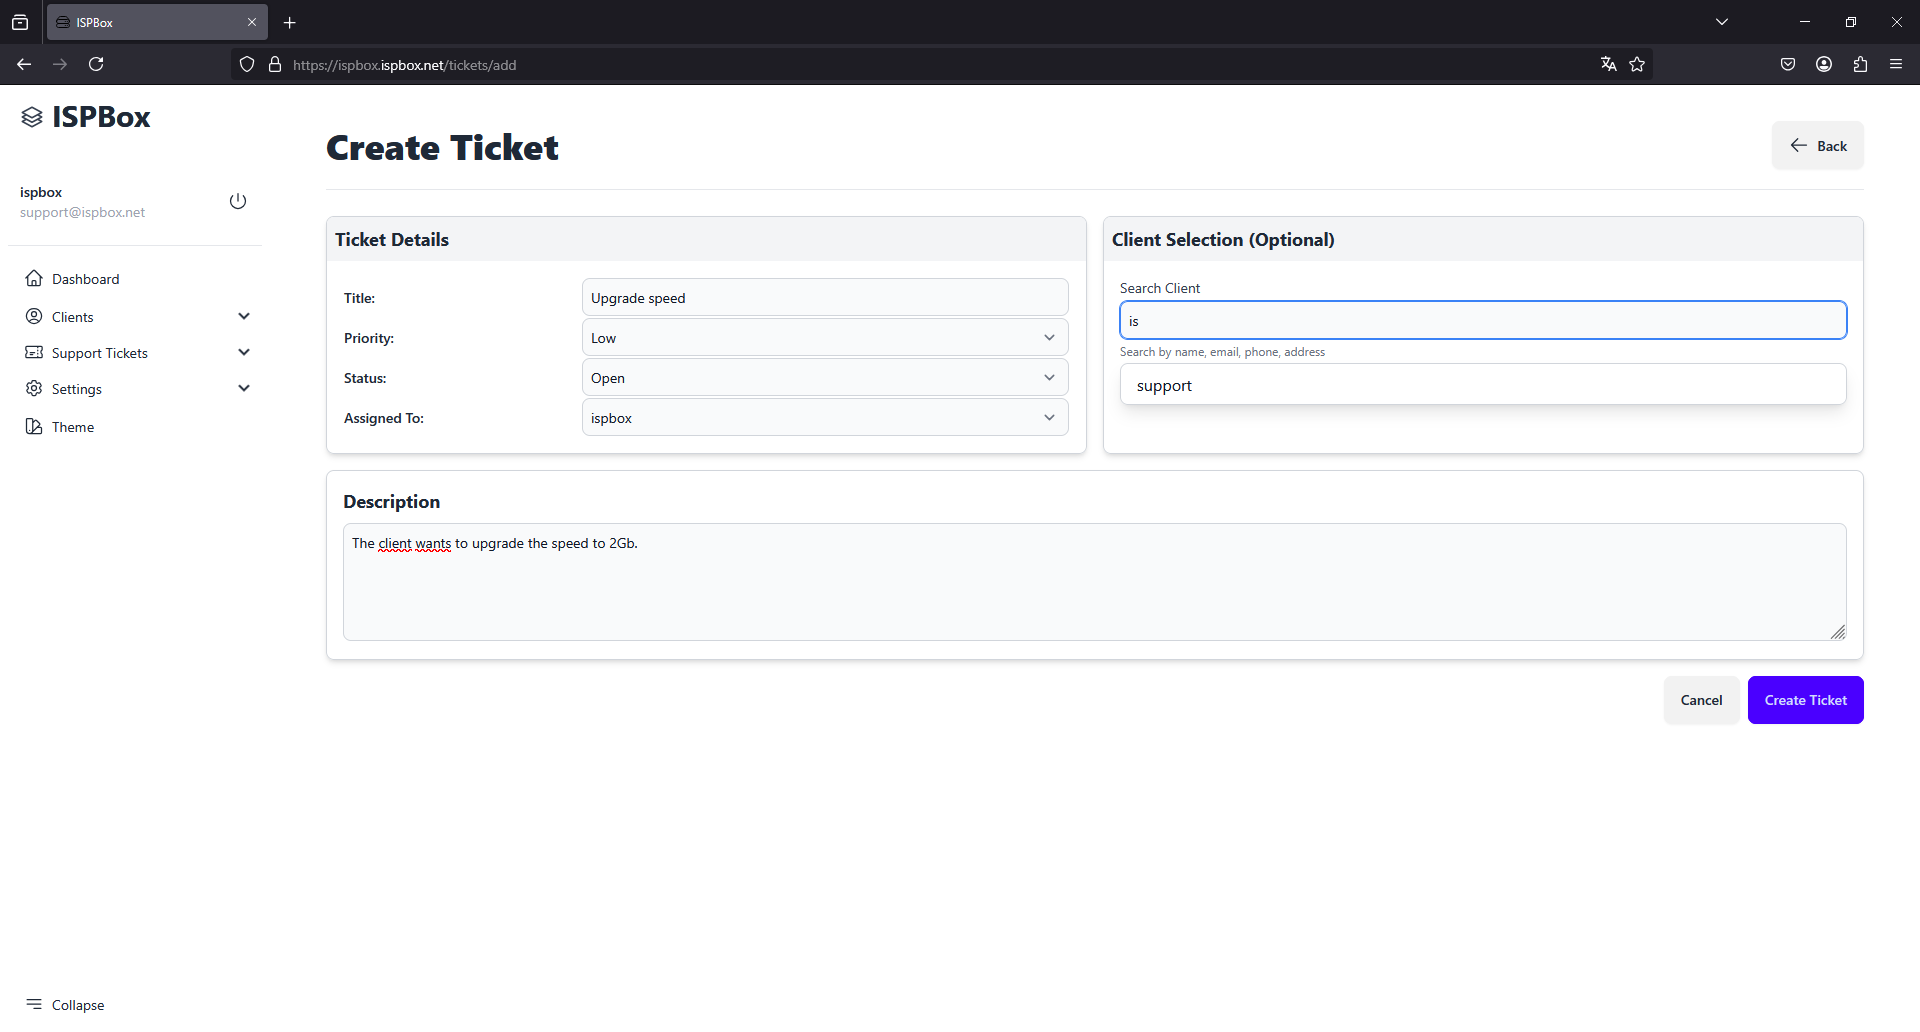
2. Filling Out the Ticket Form
Whether adding from a client's profile or the Support Tickets section, the process to fill out the form is the same:
- Title: Enter a succinct title for the ticket that describes the issue.
- Priority: Choose the level of urgency (Low, Medium, High).
- Status: Set the ticket's current state (e.g., Open, In Progress).
- Assigned To: Assign the ticket to a staff member.
- Description: Provide a detailed explanation of the issue.
After filling out the form, click "Create Ticket" to submit the ticket. You will receive a confirmation once the ticket is successfully created, and it will appear in the ticket list.
This structure guides you through the ticket creation process within ISPBox, ensuring clarity and ease of use whether adding a ticket from a client's profile or directly via the support ticket menu.